Here you find building instructions. They are a bit succinct at the moment, please read the paper,
look at the videos and ask questions on the mailing list. Note: the videos covers WoodenHaptics 1.1 (smaller motors, and red ball handle).
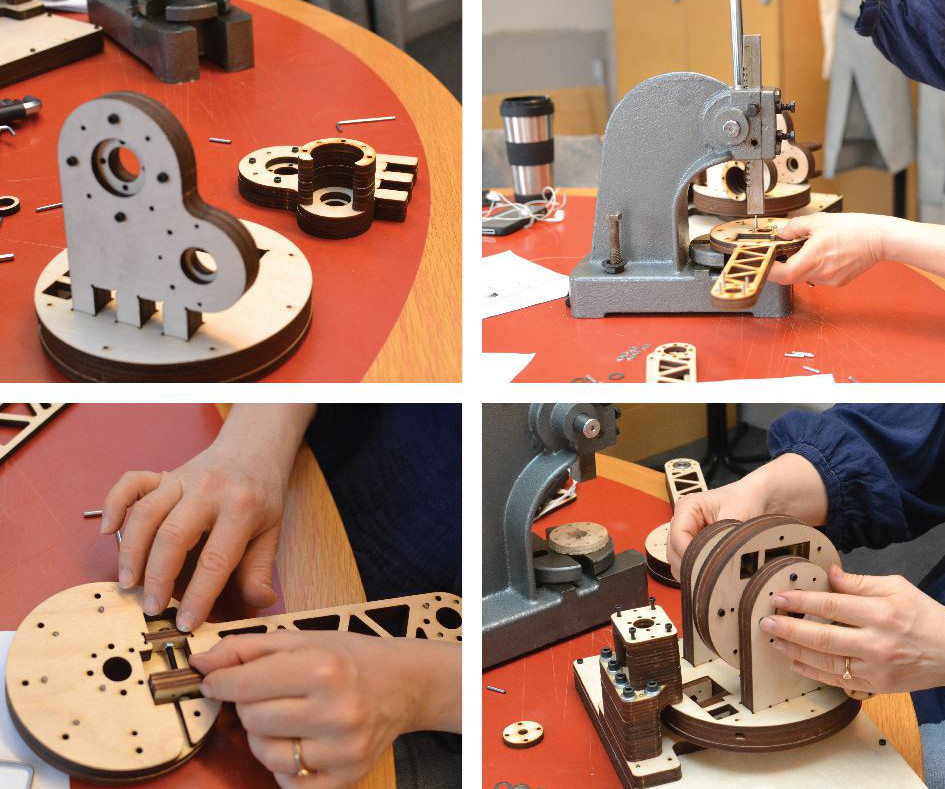
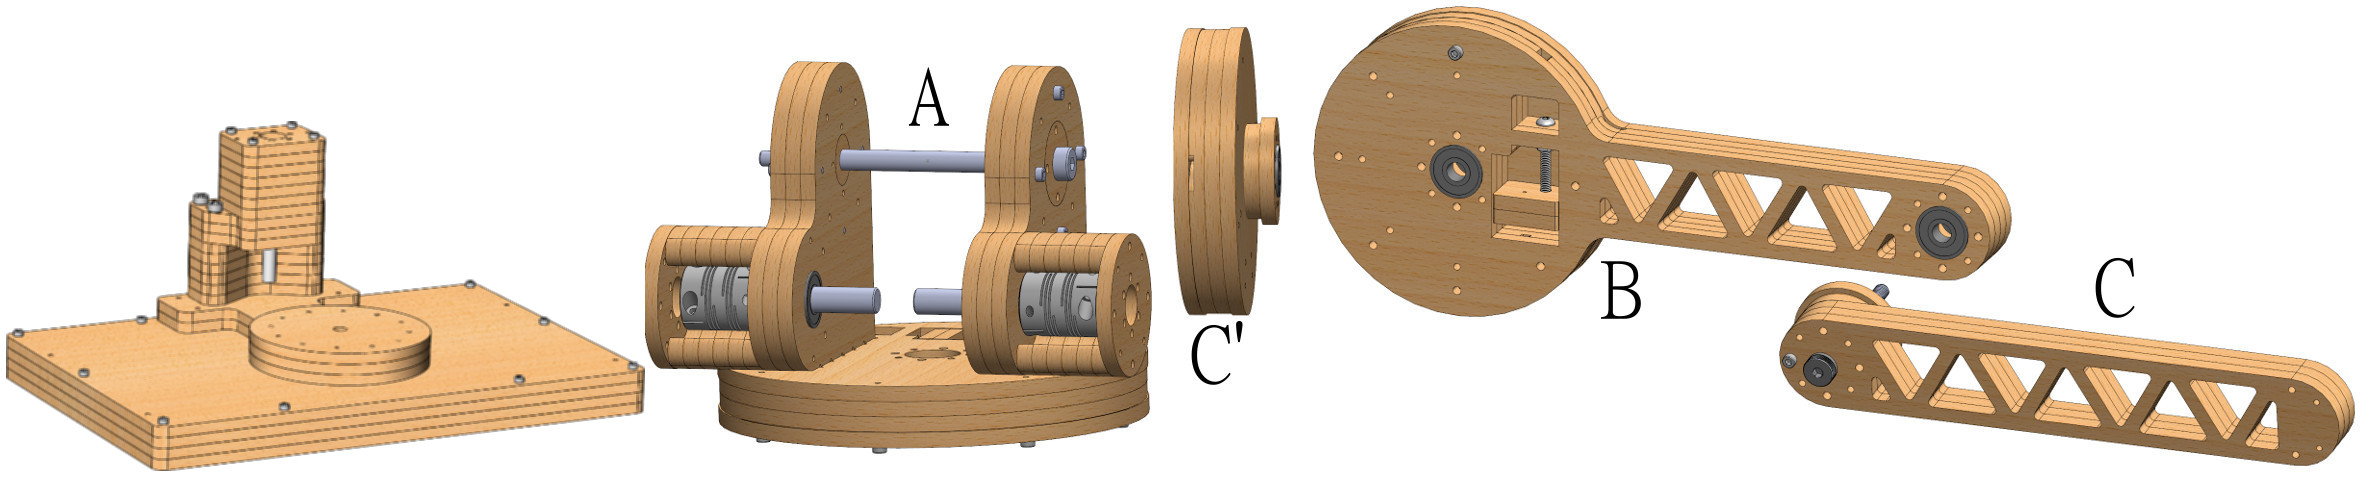
These are the bodies we are going to build: Base, Body A, Body B, Body C and Body C'. Until we have
better written instructions, you will be helped a lot by looking at the CAD files from the
repository or through onshape where each body is found in a separate folder. The following videos cover the assembly of each body, the whole out of the bodies and cabling.
The first video in the series introduces building techniques, concepts etc as well as assembly of the base body.
This second video shows the assembly of body A (turntable).
Assembly of body B (first link/arm). No spoken instructions.
Assembly of Body C' (the "gear" for the second arm/link), and C (final link/arm). No spoken instructions.
Final assembly of the bodies. No spoken instructions.
Cabling, i.e. mounting the steel wire rope. This step might need more explanations, feel free to ask on the mailing list.
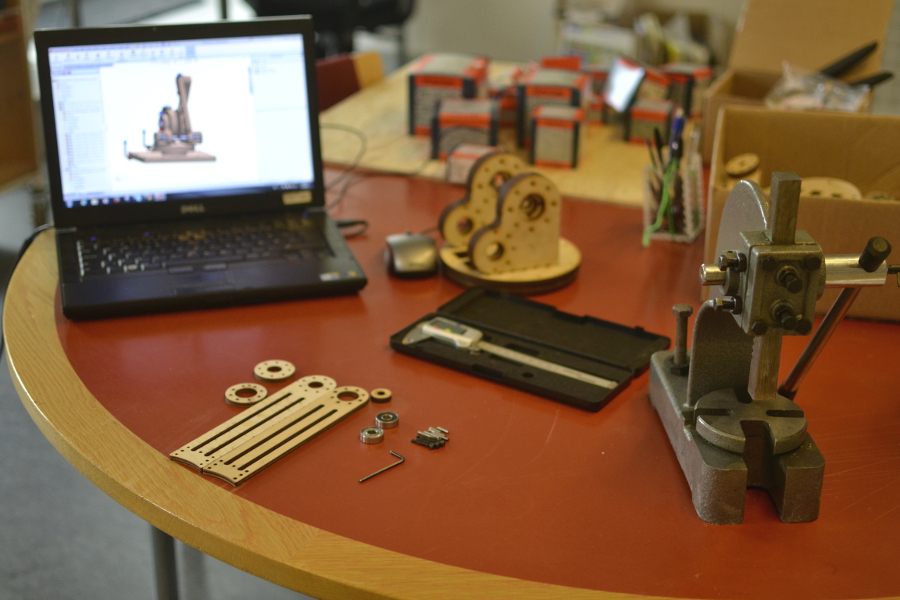
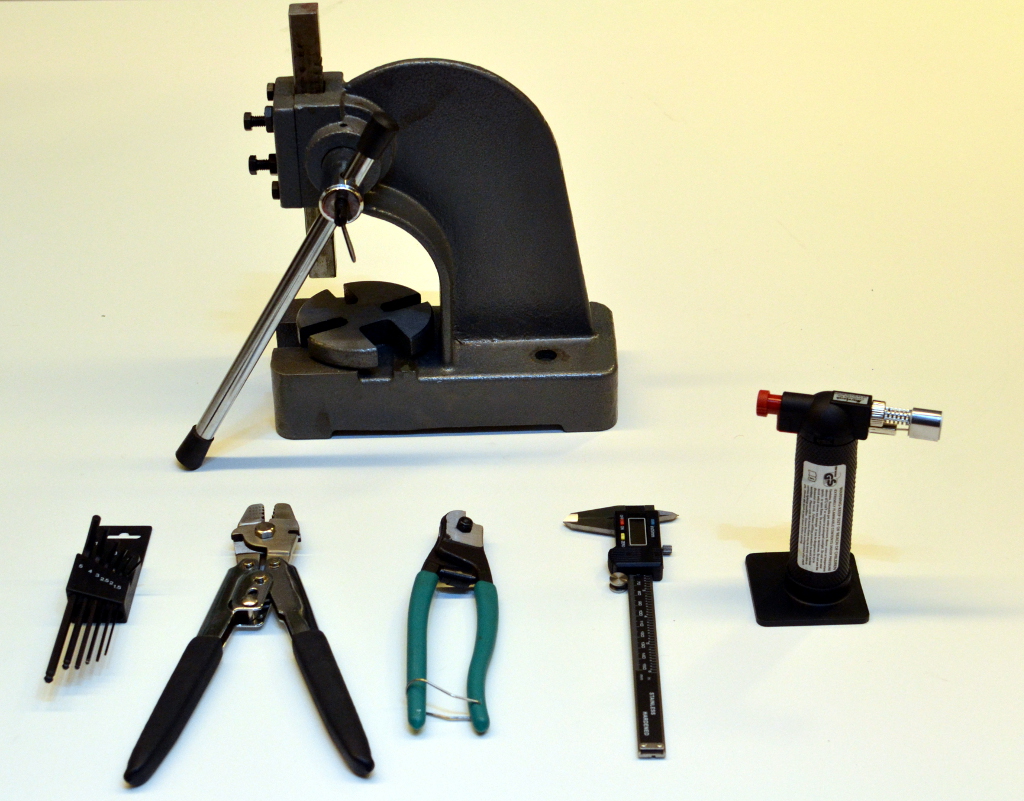
To assemble the device you need a set of tools. We will discuss them below. You can find the suppliers
we used in the Bill of Materials sheet under
"required tools for mechanics workbench".
Top: Arbor press. Bottom from the left: hex keys (long), cable ferrule crimping tool, cable cutter,
digital caliper and a gas burner. In addition you need an adjustable wrench. Tweezers come in handy too.
Arbor press
This tool can be bought in different sizes from a machine tool supplier. The one pictured is
the smallest and to press fit the shaft holder part of body A it could be better with a larger one,
that can open up at least 161 mm. A name of this tool in Swedish is "verkstadspress".
Hex keys
Standard mm hex keys are used, but chose the ball-ended extra long ones if you can.
Cable (wire rope) ferrule crimping tool
This tool has to be matched with the size and shape of the ferrules (metal piece that are compressed onto
cables). Trust me, I have tried alternatives, you need the real stuff. I (Jonas) use the
TechniCable 115.007.023.
There are good options from Savea Cable in the US.
Cable (wire rope) cutter
Cheap one (pictured) works okay but I would buy the swiss made ones the next time.
Digital caliper
This tool is unbearable to quickly verify a screw length, or the thickness of your plywood sheets
(that never are exactly what they are specified to be).
Gas burner
This is used to burn the cable before cutting to avoid that the cable fries. A lighter might not be
hot enough but a cheap gas burner (for cooking) is great.
Cabling is a crucial aspect of the device and very important to get right. You do not want the cables to
run over each other so careful attention is required. Don't worry though, the skill comes with practice. Here is an informative video about how to form loops.
This video shows how to use the crimping tool (from the Supplier website).